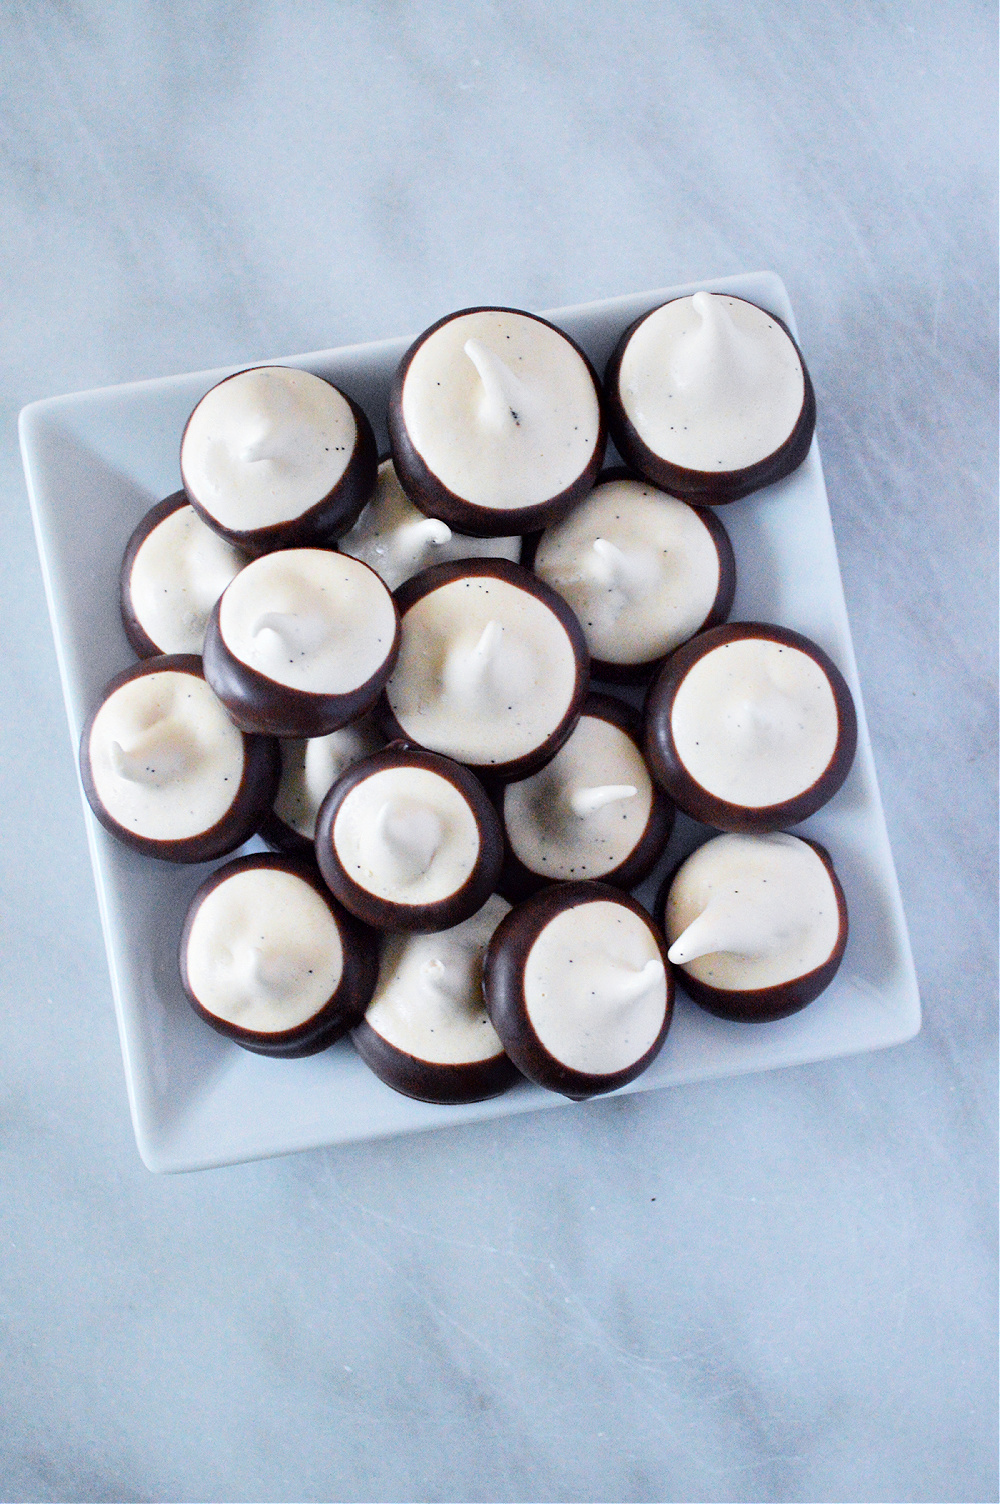
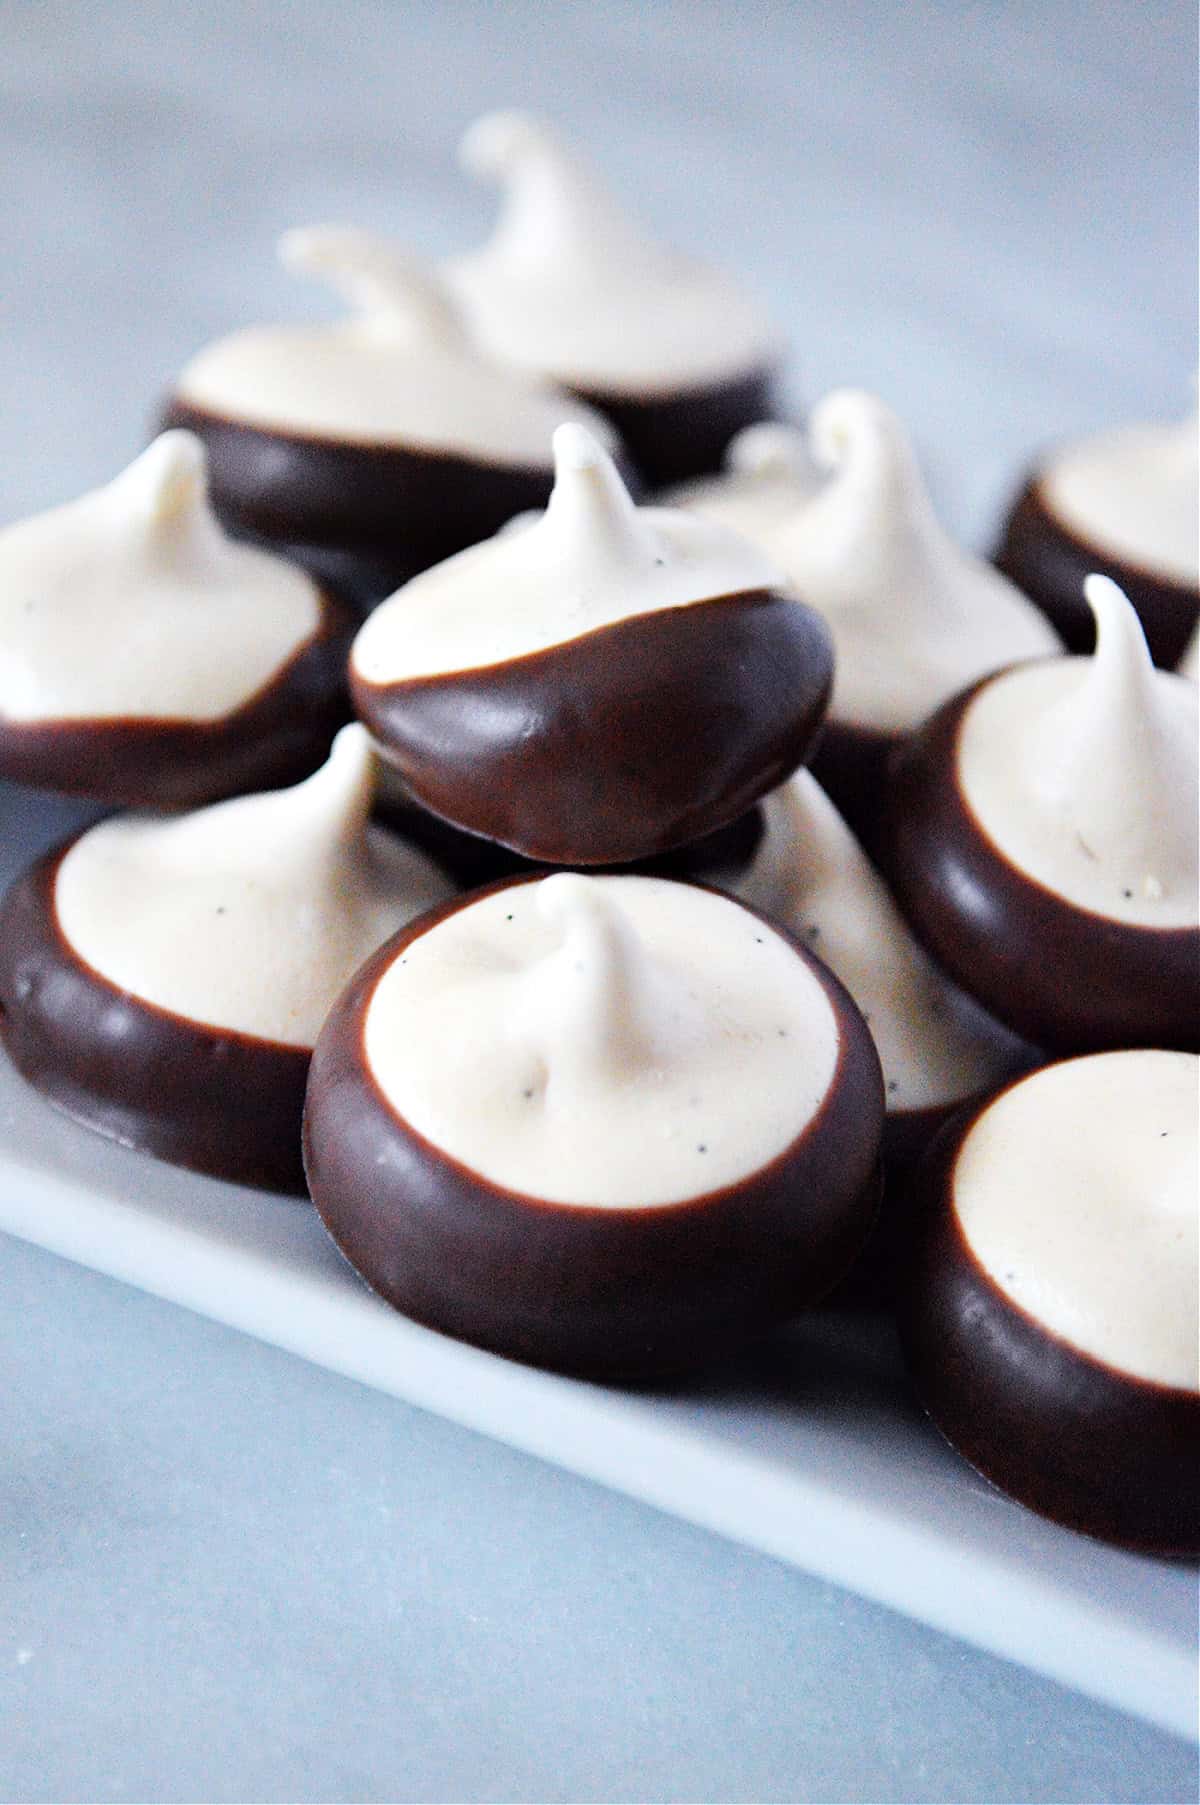
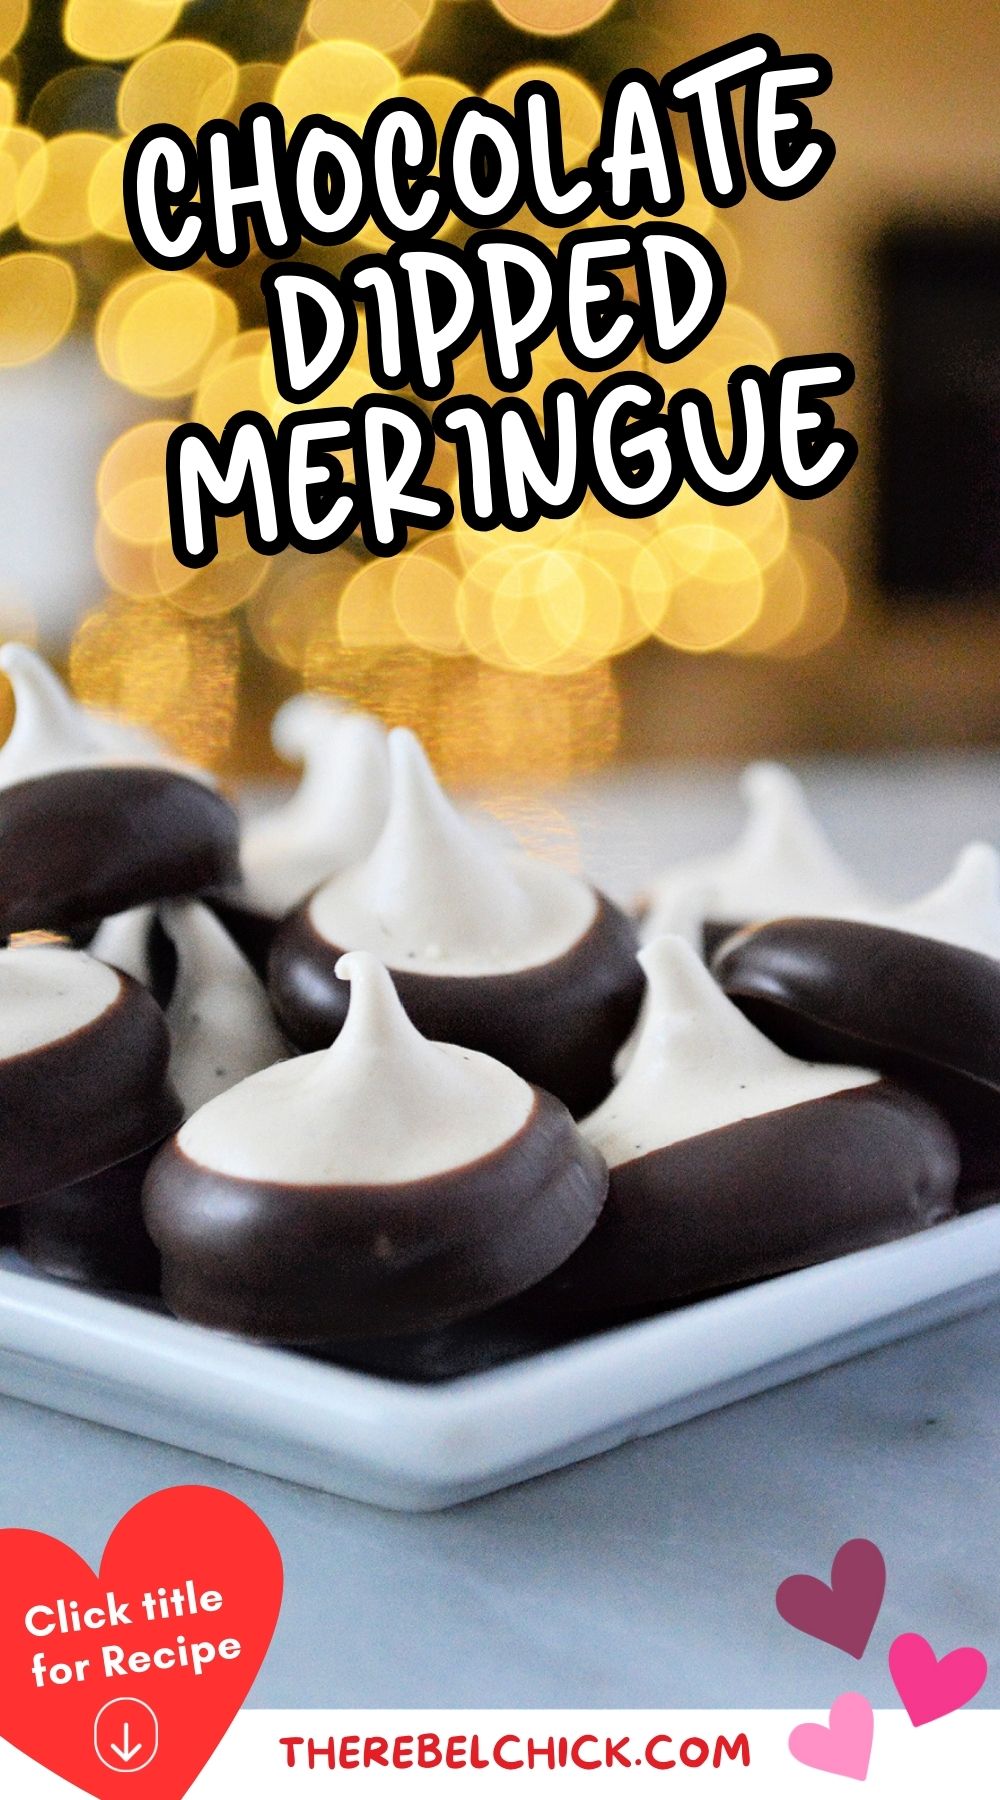
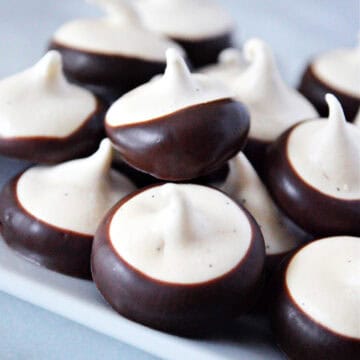
This Chocolate Dipped Meringue Recipe takes a little bit of work to make, but it is so tasty that it is worth the effort! They're perfect for making for your upcoming holiday parties and also great for gifting to neighbors, coworkers, and of course - a hostess gift!
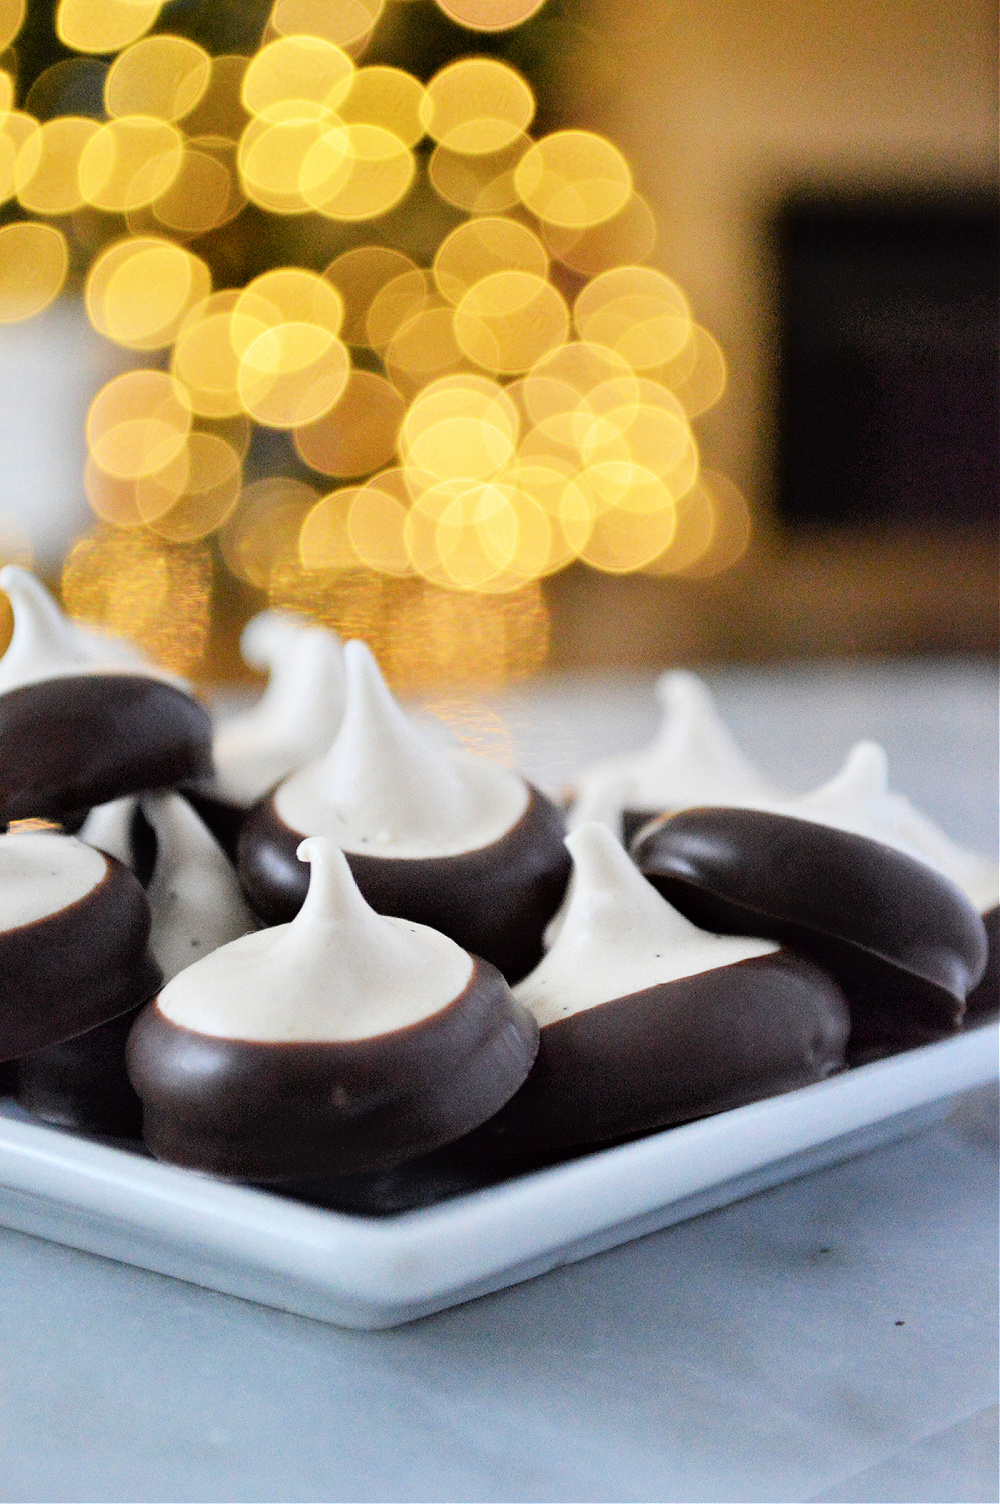
Chocolate Dipped Meringue Recipe
It can be difficult to decide what to give these people in our lives, do we buy them a gift? Do we make something? Just give them a card? Well, a homemade treat is ALWAYS a great idea!
I love easy to make treats to play with during the holiday season.
It is so nice to be able to whip up something sweet and delicious to serve your holiday guests - but also to pack up in a nice Christmas tin and give out as hostess gifts and homemade gifts for family and friends!
How to make Chocolate Dipped Meringues
Here are the ingredients you need to gather to get started making this Chocolate Dipped Meringue Recipe:
- Egg whites
- Confectioners’ sugar
- Pure vanilla extract or other pure flavoring
- Quality chocolate
Get all of your cooking and baking supplies on Amazon.com!
Amazon Prime Fresh has TONS of household supplies and groceries at great prices and offers free delivery with an Amazon Prime membership! Sign up for Amazon Prime Fresh here!
Keep in mind, all of the ingredient amounts you’ll need are in the printable recipe card below.
How to Make this Chocolate Dipped Meringue Recipe
Directions for making this Chocolate Dipped Meringue Recipe
Carefully wash the outside of the eggs with cold water, then separate saving the whites (it is easier to separate the yokes and whites when the eggs are cold).
Lightly covered the egg whites and let rest until they are room temp. This down time is perfect for prepping the rest of the steps and work space.
Line a cookie sheet or baking try with parchment paper or a silicone oven mat, lightly flouring the paper or mat will sometimes help to make sure they don’t stick once fully baked. Select the tip(s) needed and set up the piping bag.
Some suggest hand whisking in a copper bowl is the only way while others prefer an electric hand mixer, we used our Kitchenaid mixer with very tasty results, less mess and faster prep time.
Once the eggs are at room temp slowly turn the mixer on to medium and mix until the egg whites become so foamy and frothy that they filled with tiny bubbles that really look like wet foam. This took about 8-10 minutes on medium with our Kitchen-aid stand mixer.
Very slowly start to add in the pre sifted confectioners’ sugar, just a couple small spoonful’s at a time, you should then wait a minute before adding more. This will roughly take another 6 to 10 minutes.
You should quickly start to see a change in consistency, add in your pure vanilla extract or other flavoring.
You can stop mixing once the mixture can hold its shape in a stiff peak (this is easy to see as soon as you turn off the mixer and lift up the whisk attachment on the mixer.
You can now carefully fill the piping bag with the meringue mixture. I like to do this by placing the piping bag in a large heavy glass that you can fold the outside of the piping bag over on. This allows you to use two hands to fill the bag.
Give the piping bag a quick twist and hold firmly so the meringue will not leak out of the open end of the bag. Once baked the meringues will only be slightly larger, so you may pipe them fairly close to one another.
The overall baking time depends on the size so be careful to be as consistent as possible when piping. A rough estimate on timing would be as follows: A 2 inch round meringue will take about 2.5 to 3 hours. ¾ inch meringues take about 45 minutes to one hour.
All ovens work differently keep a close eye on the temperature, you’ll want the oven to be at 200 degrees for the duration of the baking time.
A separate oven thermometer that can stay in might be a great purchase if you have an inconsistent oven or if you are still getting to know yours.
Once the meringues have fully cooled follow the package instructions for melting the chocolate, I tend to do a little at a time to help keep it hot enough once melting.
Carefully hold the top of each meringue and dip as much or little into the chocolate as you like.
You can then place right back onto the same parchment paper as they were baked on (just dust off the flour first).
TOP TIP
If you’re finding that there is a little too much chocolate puffing up around the cookies once back on the try you can gently scrape a little off of the bottom by running it over the edge of the dish with the melted chocolate.
Let the chocolate harden then store in an air tight container for up to a week.
Share this Chocolate Dipped Meringue Recipe with your friends and family on social media!
If you love this Chocolate Dipped Meringue Recipe as much as we do, please leave me a 5-star review below and help me share this recipe on Facebook, Twitter and Pinterest!
If you do make the recipe, I hope you’ll share that you tried it on Pinterest! I love it SO MUCH when readers share their feedback!
To print this Chocolate Dipped Meringue Recipe, simply click the recipe card below!
I know that many people still like to print out recipes and keep them in a recipe binder, or simply have the printed recipe sitting in front of them when it comes time to cook! You can also email this recipe!
Chocolate Dipped Meringue
Ingredients
- 3 egg whites
- 1.5 cups confectioners’ sugar
- ⅛ teaspoon pure vanilla extract
- 4-8 ounces chocolate
Instructions
- Carefully wash the outside of the eggs with cold water, then separate saving the whites (it is easier to separate the yokes and whites when the eggs are cold) Lightly covered the egg whites and let rest until they are room temp. This down time is perfect for prepping the rest of the steps and work space. Line a cookie sheet or baking try with parchment paper or a silicone oven mat, lightly flouring the paper or mat will sometimes help to make sure they don’t stick once fully baked. Select the tip(s) needed and set up the piping bag.
- Some suggest hand whisking in a copper bowl is the only way while others prefer an electric hand mixer, we used our Kitchenaid mixer with very tasty results, less mess and faster prep time.
- Once the eggs are at room temp slowly turn the mixer on to medium and mix until the egg whites become so foamy and frothy that they filled with tiny bubbles that really look like wet foam. This took about 8-10 minutes on medium with our Kitchen-aid stand mixer. Very slowly start to add in the pre sifted confectioners’ sugar, just a couple small spoonful’s at a time, you should then wait a minute before adding more. This will roughly take another 6 to 10 minutes. You should quickly start to see a change in consistency, add in your pure vanilla extract or other flavoring. You can stop mixing once the mixture can hold its shape in a stiff peak (this is easy to see as soon as you turn off the mixer and lift up the whisk attachment on the mixer.
- You can now carefully fill the piping bag with the meringue mixture. I like to do this by placing the piping bag in a large heavy glass that you can fold the outside of the piping bag over on. This allows you to use two hands to fill the bag. Give the piping bag a quick twist and hold firmly so the meringue will not leak out of the open end of the bag. Once baked the meringues will only be slightly larger, so you may pipe them fairly close to one another. The overall baking time depends on the size so be careful to be as consistent as possible when piping.
- A rough estimate on timing would be as follows:
- A 2 inch round meringue will take about 2.5 to 3 hours.
- ¾ inch meringues take about 45 minutes to one hour.
- All ovens work differently keep a close eye on the temperature, you’ll want the oven to be at 200 degrees for the duration of the baking time. A separate oven thermometer that can stay in might be a great purchase if you have an inconsistent oven or if you are still getting to know yours.
- Once the meringues have fully cooled follow the package instructions for melting the chocolate, I tend to do a little at a time to help keep it hot enough once melting. Carefully hold the top of each meringue and dip as much or little into the chocolate as you like. You can then place right back onto the same parchment paper as they were baked on (just dust off the flour first). If you’re finding that there is a little too much chocolate puffing up around the cookies once back on the try you can gently scrape a little off of the bottom by running it over the edge of the dish with the melted chocolate. Let the chocolate harden then store in an air tight container for up to a week

Carlee says
YUUUUUM! I have never dipped my meringues in chocolate, but these look like perfect little treats. Maybe for Christmas this year!
Stephanie says
I love meringues but have never attempted making them- I think I'll have to give it a try! Thanks for sharing!
Jaimi@TheStay-at-Home-Mom Survival Guide says
These look amazing! I love the uniqueness of this dessert, and anything with chocolate wins in my book! Thanks for sharing at Wonderful Wednesday.
Diana L. says
These little treats look scrumptious! What a lovely idea. I agree, perfect for gift giving.
Kathryn says
I've never been a huge fan of meringues, but I can do pretty much anything with chocolate! And yours look so pretty. Pinned. 🙂
Julie says
My son is a massive meringue fan so we always have them for special occasions, I love the idea of dipping them in chocolate. I was surprised you say to cook them at 200 degrees until I realised you mean fahrenheit not centigrade! They'd be very well done at 200 degrees c!
Leigh Powell Hines says
These look wonderful. I bet they are fantastic. Light as air.
Heather @ Simply Save says
These look so good! Perfect gift idea for someone who doesn't need or want more stuff! Thanks for sharing on the Small Victories Sunday Linkup!
Ducks n a Row says
Wow, these candies look so good. They would truly make a great gift!
Your recipe was one of the most viewed at our party last week so you will be FEATURED this week at Wonderful Wednesday Blog Hop. Hope you can stop by!
Sinea
Suzanna @ One Hoolie Mama says
These are so pretty! I may have to give them a try one afternoon while the kiddos are napping 🙂 Thanks for linking up with #smallvictoriessunday
Kim Beaulieu says
These are SO delicious, plus they're so pretty. Everyone loves them!