• Skip to primary navigation
  • Skip to main content
  • Skip to primary sidebar

The Rebel Chick

Miami Lifestyle Travel and Food - Jennifer Quillen

  • Food
  • Travel
  • Lifestyle
  • Pets
  • Style & Beauty
  • Shopping
  • Entertainment
menu icon
go to homepage
  • Food
  • Lifestyle
  • Travel
  • Pets
  • Beauty
  • Entertainment
  • Contact Me
  • eBay Store
    • Email
    • Facebook
    • Instagram
    • Pinterest
    • Twitter
    • YouTube
  • search icon
    Homepage link
    • Food
    • Lifestyle
    • Travel
    • Pets
    • Beauty
    • Entertainment
    • Contact Me
    • eBay Store
    • Email
    • Facebook
    • Instagram
    • Pinterest
    • Twitter
    • YouTube
  • ×

    Home » Lifestyle

    DIY Valentine's Day Bud Vase Tutorial

    January 16, 2014 by Jenn 4 Comments

    496 shares
    • Share
    • Tweet
    • Email
    • Reddit
    • Yummly

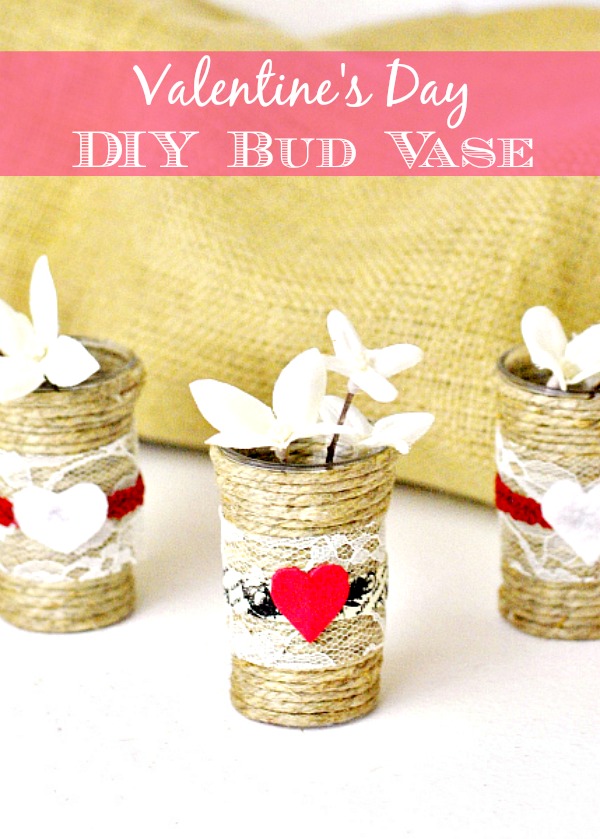
    With Valentine's Day in a few weeks (I know, already?!), it's time to break out of your comfort zone, skip the boring old store-bought gifts, and give your loved ones a gift from the heart. I am totally not a crafty person, but I can do the basics, like this DIY Valentine's Day Bud Vase.

    Costs will be low for this adorable little Valentine's Day Bud Vase because the most expensive part - the shot glass - is something most of us already have at home. If you don't have a stash of shot glasses (we have a ton leftover from our wild house party days), you can pick up one for a buck at your local dollar store. You are likely to find the rest of these supplies at the dollar store as well!
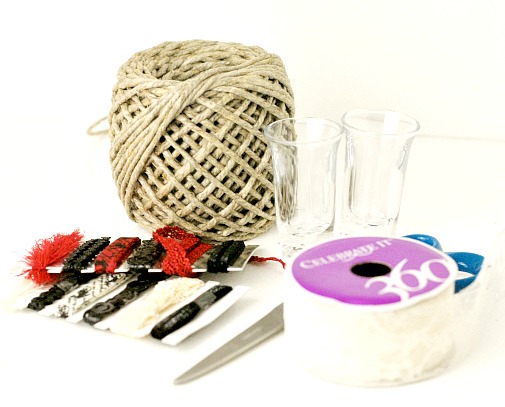
    Valentine's Day Bud Vase Tutorial

    Materials:

    • Small shot glasses
    • Sisal rope
    • Scissors
    • Hot glue gun
    • Embellishments: lace, trimming, felt, etc.

    DIY valentines vases tutorial

    Instructions:

    Starting at the bottom of the shot glass, run a thin layer of hot glue and attach the sisal rope to the shot glass.

    DIY Valentine's Day Vases Tutorial 3
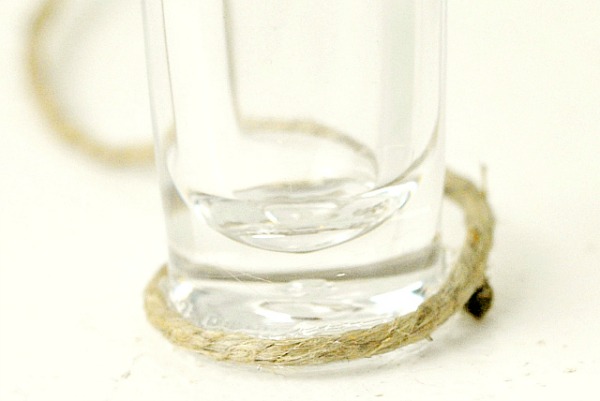
    Continue wrapping the sisal rope up the entire length of the shot glass, pulling tightly and pressing the rope together as you go.

    DIY valentines vases tutorial 1

    Secure the sisal rope with another thin layer of hot glue when you get to the top of the glass, and cut off the loose end of rope. You can hot glue as you go up if you like, but a layer of glue at the top and bottom is all that is needed.

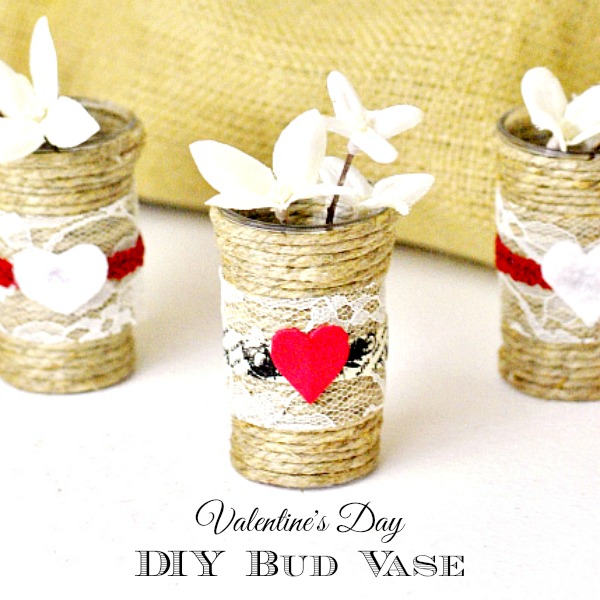
    Wrap the sisal covered shot glass with lace and other Valentine's inspired embellishments and fill with flowers to create Valentine's bud vases.

    DIY Valentine's Day Tutorial 2


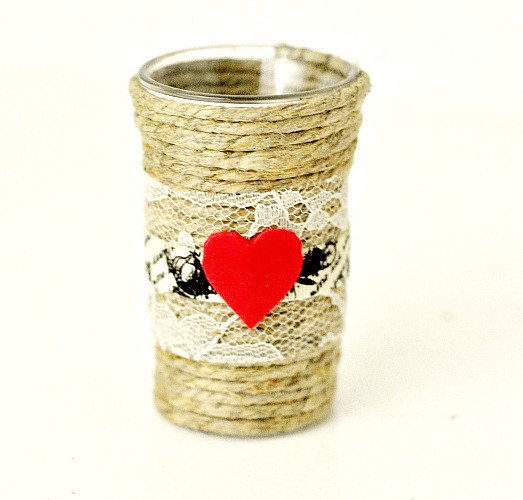
    See how easy that was? These little Valentine's Day Bud Vases make a great decoration for your own home or a sweet little gift for a loved one!

    DIY Valentine's Day Bud Vase Tutorial

    More Lifestyle

    • What is Afterpay and What to Expect
    • Does Medicare Cure Diabetes
    • Discover the Best Daily Supplements and Vitamins for Adults
    • How To Handle The Stress Of A Family Health Crisis
    496 shares
    • Share
    • Tweet
    • Email
    • Reddit
    • Yummly

    About Jenn

    Jenn, AKA "The Rebel Chick," is a single woman who strives to help her readers live their best lives possible. Whether it be through sharing new recipes, sharing her dating stories, or encouraging people to embrace adventure and travel, she aims to inspire people to live full, happy and authentic lives.

    Reader Interactions

    Comments

    1. Stephanie

      January 16, 2014 at 10:02 am

      These turned out so super cute. I need to make something like this for my house, my Valentine's Day decor is seriously lacking.

      Reply
    2. Nichol

      January 16, 2014 at 10:06 am

      Jenn, this is absolutely adorable. A craft I can do too and can be customized for my home.

      Reply
    3. Michelle

      January 22, 2014 at 12:30 pm

      I love the look of twine-wrapped vases! I'll have to try this sometime. 🙂

      Reply
    4. Melissa

      February 09, 2014 at 10:13 am

      Your bud vases are great! I have seen the sisal wrap on so many things, and would have never thought to use it in that way. The trimmings really made the whole thing. Loved it! Thanks for the great idea.

      Reply

    Leave a Reply Cancel reply

    Your email address will not be published. Required fields are marked *

    Recipe Rating


    This site uses Akismet to reduce spam. Learn how your comment data is processed.

    Primary Sidebar

    • Email
    • Facebook
    • Instagram
    • Pinterest
    • Twitter
    • YouTube

    Hi, I'm Jennifer! I'm a Miami native and I love sharing easy dinner recipes, baking recipes, travel ideas and general Miami Lifestyle fun! Follow along for inspiration on how to make the most our of life!

    More about me →

    Recent Popular Recipes

    • Mini Charcuterie Box Ideas
    • Swapping To Healthy Snacks on a Budget: How to Snack Better
    • Valentine Bundt Cake Recipe: Bundt Cake vs Regular Cake
    • Valentines Chocolate Bark Recipe

    Archives

    Subscribe to The Rebel Chick Newsletter

    * indicates required

    Footer

    ↑ back to top

    About

    • Privacy Policy
    • Disclaimer

    Newsletter

    • Sign Up! for The Rebel Chick emails and updates, usually sent monthly or quarterly.

    Contact

    • Contact
    • Services
    • Media Kit

    The Rebel Chick is a participant in the Amazon Services LLC Associates Program, Share-a-Sale, Commission Junction, Rakuten and LinkShare; affiliate advertising programs designed to allow me to earn advertising fees by advertising these affiliate links. 

    Copyright © 2023 · Jennifer Pridemore Quillen · All Rights Reserved TheRebelChick.com

    496 shares